Silky Chocolate Ganache: The Only Recipe You’ll Ever Need
Imagine having a rich, silky chocolate ganache at your fingertips to elevate your baked goods. With just two ingredients and a few minutes, you can create a pure and decadent delight. To ensure ganache success, it’s crucial to read the troubleshooting tips and recipe notes before you begin.

This versatile recipe is a game-changer for any baker. You can use it as a topping, filling, or frosting for your favorite desserts. The best part? It’s incredibly easy to make and requires minimal ingredients. By following this simple chocolate ganache recipe, you’ll be able to create stunning desserts that will impress your friends and family.
The Magic Behind Perfect Chocolate Ganache
The secret to a perfect chocolate ganache lies in its simplicity and versatility. You can use it as a glaze, a filling, or even a frosting, making it a staple in any baker’s kitchen.
What Makes Ganache So Versatile
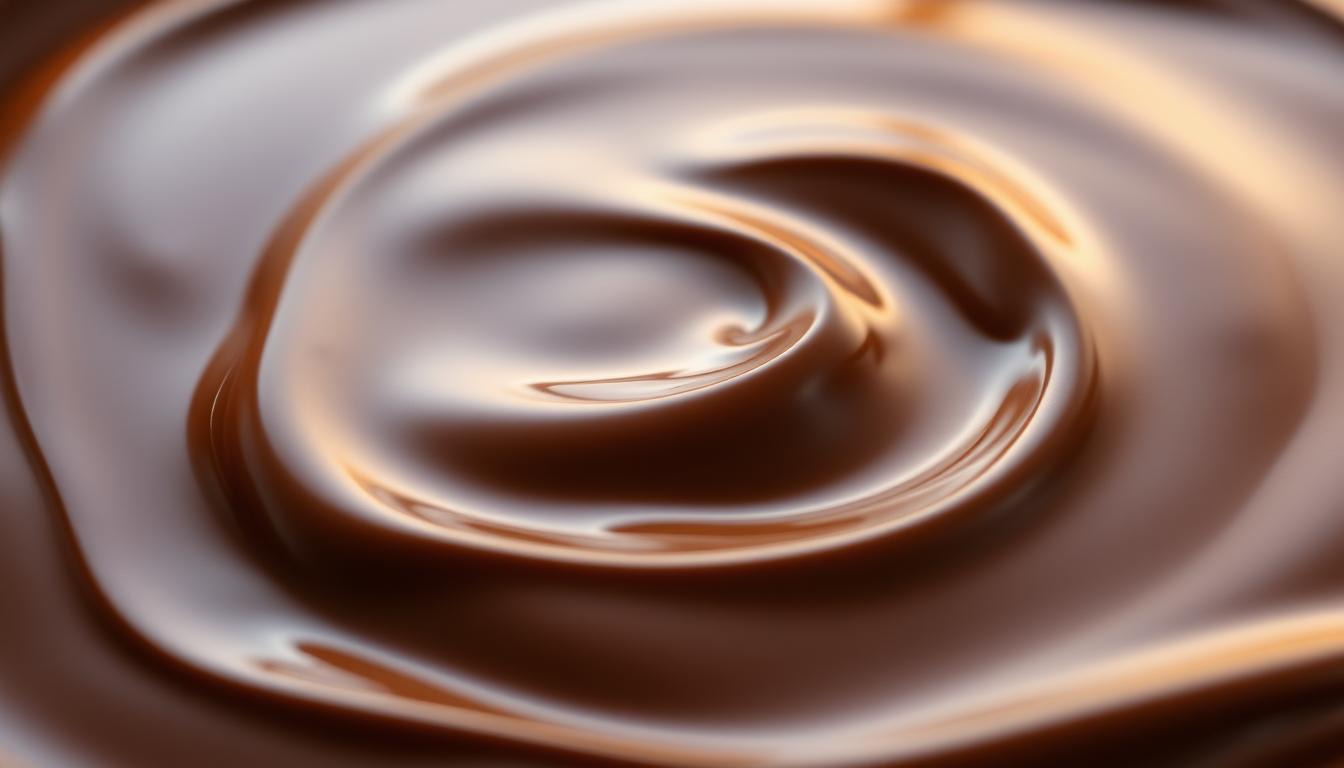
Ganache is uniquely versatile due to its ability to be used in various applications, from glazes and frostings to fillings and truffles. This versatility stems from its composition: a mixture of chocolate and warm cream stirred until smooth, silky, and shiny.
The Science of Emulsion
The magic of ganache lies in its emulsion – a stable mixture of two or more liquids that don’t normally mix, like oil and water. In the case of chocolate ganache, it’s the combination of cocoa butter (from the chocolate) and cream. When you heat the cream and mix it with chocolate, the cocoa butter emulsifies with the cream, creating a smooth and shiny texture. Understanding this science is key to making perfect ganache every time.
Essential Ingredients for Foolproof Chocolate Ganache
To make a truly exceptional chocolate ganache, you need to begin with the best ingredients. The quality and type of chocolate and cream you use can significantly impact the final product.
Choosing the Right Chocolate
The type of chocolate you choose is crucial for the flavor and texture of your ganache. High-quality chocolate yields a better-tasting ganache.
Dark vs. Milk vs. White Chocolate
Dark chocolate provides a rich, intense flavor, while milk chocolate adds a sweeter, creamier taste. White chocolate, on the other hand, offers a vanilla-like flavor. For the best tasting ganache, I recommend using semi-sweet chocolate. You can use high-quality chocolate chips if needed, but pure chocolate baking bars are preferred.
| Chocolate Type | Flavor Profile | Cocoa Content |
|---|---|---|
| Dark Chocolate | Rich, intense | 60% – 90% |
| Milk Chocolate | Sweet, creamy | 30% – 40% |
| White Chocolate | Vanilla-like | 0% (no cocoa solids) |
Chocolate Quality Considerations
When selecting chocolate, consider the cocoa content and the presence of additives. Higher cocoa content generally results in a more intense chocolate flavor.
Cream Selection and Alternatives
The type of cream used can affect the richness and texture of your ganache. Heavy cream is commonly used, but you can also experiment with half-and-half or non-dairy alternatives for different effects.
Optional Flavor Enhancers
To give your ganache an extra boost, consider adding flavor enhancers like vanilla extract or liqueurs. These can add depth and complexity to your ganache.
Understanding Chocolate Ganache Ratios
The ratio of chocolate to cream is the key to creating ganache that’s just right for your needs. Adjusting this ratio allows you to achieve different textures suitable for various applications, from truffles to frostings.
1:1 Ratio for Truffles and Fillings
Using equal parts chocolate and cream results in a thick, rich ganache ideal for truffles and cake fillings. This dense texture provides a luxurious mouthfeel and is perfect for layer cakes or as a filling for chocolates.
1:2 Ratio for Glazes and Pourable Ganache
When you need a thinner consistency, using more cream than chocolate creates a smooth glaze or pourable ganache. This is great for drizzling over desserts or creating a glossy finish on cakes and pastries.
| Ratio | Application | Texture |
|---|---|---|
| 1:1 | Truffles, Fillings | Thick, Rich |
| 1:2 | Glazes, Pourable Ganache | Thin, Smooth |
| 2:1 | Firm Frosting | Stiff, Holds Shape |
Adjusting the chocolate to cream ratio is crucial for achieving the desired texture and application. Experimenting with different ratios will help you master the art of chocolate ganache.
Step-by-Step Chocolate Ganache Recipe
With a simple recipe and some easy-to-follow steps, you can create perfect chocolate ganache every time. The key to success lies in the preparation and the technique.
Preparing Your Ingredients
To start, you’ll need to prepare your ingredients. Finely chop the chocolate and place it in a heat-proof bowl. The quality of the chocolate will directly impact the flavor of your ganache, so choose a good-quality chocolate.
The Heating Process
Next, you’ll need to heat the cream. You can do this using either the stovetop or microwave method.
Stovetop Method
Heat the cream on the stovetop until it just begins to simmer. Be careful not to let it boil over.
Microwave Method
Alternatively, you can heat the cream in the microwave in short bursts until it’s hot and steamy.
Combining Chocolate and Cream
Place finely chopped chocolate into a heat-proof glass or metal bowl. Heat cream on the stovetop until just simmering. Pour over chocolate, then let it sit for 2-3 minutes to gently soften the chocolate. This step is crucial for creating a smooth ganache.

Proper Stirring Technique
After letting the chocolate and cream mixture sit, it’s time to stir. Use a gentle, sweeping motion to combine the chocolate and cream. Start from the center and work your way outwards, making sure to incorporate all the chocolate.
Cooling and Setting
Once you’ve stirred the ganache, let it cool to room temperature. This will help it to set properly. Depending on the ratio of chocolate to cream, your ganache may be ready to use immediately or may need to be refrigerated to firm up.
Troubleshooting Common Ganache Problems
Ganache, while generally easy to make, can occasionally present some challenges. Whether you’re a seasoned chocolatier or a beginner, understanding how to troubleshoot common ganache problems can save you time and frustration.
Fixing Separated Ganache
If your ganache has separated, don’t panic. This often happens when the chocolate and cream haven’t been heated to the right temperature or if they’ve been mixed too vigorously. To fix it, gently reheat the mixture over low heat, whisking constantly until it comes back together smoothly.
Dealing with Grainy Texture
A grainy texture usually indicates that the chocolate hasn’t melted properly. Ensure that you chop your chocolate into fine pieces and that your cream is warm enough. If the ganache is already made, you can try reheating it gently while stirring.
Adjusting Thickness
The ratio of chocolate to cream determines the ganache’s thickness. If it’s too thin, you can add more chocolate. If it’s too thick, a little more cream can help. Make adjustments gradually, checking the consistency as you go.
Salvaging Overheated Ganache
Overheating can cause ganache to seize or become too thick. If this happens, you can sometimes salvage it by slowly adding a small amount of warm cream while stirring vigorously.
Preventing Butter Bloom
Butter bloom occurs when ganache is stored improperly, causing fat to migrate to the surface. To prevent this, store your ganache in an airtight container in a cool, dry place. If you live in a warm climate, consider refrigerating it.
By understanding these common ganache issues and how to fix them, you’ll be better equipped to create smooth, creamy, and delicious chocolate ganache every time.
Creative Ways to Use Your Ganache
Now that you’ve mastered the art of making chocolate ganache, it’s time to explore the numerous creative ways to use it. Your ganache can be a versatile ingredient in many desserts, from cakes and cupcakes to truffles and ice cream.
As a Glaze or Frosting
Ganache can be used as a glaze or frosting for cakes and cupcakes, adding a rich, chocolatey flavor. To achieve the perfect glaze, you need to adjust the consistency of your ganache.
Cake Glazing Techniques
For a smooth glaze, pour the ganache over a chilled cake. This helps the ganache set quickly and evenly. You can also use a spatula to spread it, creating a beautiful, glossy finish.
Cupcake Frosting Tips
For cupcakes, you can use ganache as a frosting by whipping it until it becomes light and fluffy. This makes it easier to pipe onto cupcakes, creating beautiful swirls and designs.

Whipped Ganache Applications
Whipping your ganache can transform it into a light and airy topping, perfect for topping cakes, cupcakes, or even using as a dip for fruit. The key is to whip it just before serving to maintain its texture.
Truffles and Fillings
Ganache is a crucial ingredient in making truffles. By rolling chilled ganache into balls and coating them in cocoa powder or chopped nuts, you can create delicious treats. It’s also used as a filling for cakes, pastries, and other desserts.
Sauce and Drizzle Ideas
Warm ganache can be used as a sauce over ice cream, pancakes, or waffles. Simply heat it gently until it reaches your desired consistency. You can also drizzle it over desserts like cheesecakes or brownies for an added chocolatey flavor.
With these ideas, you can now explore the many creative ways to use your chocolate ganache, elevating your desserts and impressing your friends and family.
Storing and Reviving Your Chocolate Ganache
Proper storage is key to maintaining the quality of your chocolate ganache. Whether you’re using it immediately or saving it for later, knowing the best storage methods will help preserve its texture and flavor.
Refrigeration Guidelines
Store completely cooled chocolate ganache in an airtight container in the refrigerator for up to 5 days. This method is ideal for short-term storage.
Freezing Options
You can also freeze ganache for up to 3 months. Simply place it in an airtight container or freezer-safe bag, making sure to press out as much air as possible before sealing.
| Storage Method | Duration | Notes |
|---|---|---|
| Refrigeration | Up to 5 days | Airtight container |
| Freezing | Up to 3 months | Airtight container or freezer-safe bag |
Reheating Methods
When you’re ready to use your stored ganache, gently reheat it. For refrigerated ganache, let it sit at room temperature for a bit before warming it in short intervals in the microwave or over a double boiler.
Shelf Life Expectations
Always inspect your ganache before using, regardless of storage method. If it appears or smells off, it’s best to err on the side of caution and discard it.
Conclusion: Mastering the Art of Chocolate Ganache
You’ve now learned the secrets to creating the perfect chocolate ganache. With practice and patience, you’ll become proficient in making this versatile dessert component. By following the tips and guidelines outlined, you’ll be well on your way to mastering chocolate ganache and experimenting with various chocolate ganache recipes.
As you’ve discovered, the key to a great ganache lies in understanding the ratios, choosing the right chocolate, and employing the proper techniques. Whether you’re using ganache as a glaze, frosting, or filling, the possibilities are endless. You can now confidently create delicious treats that will impress friends and family.
To further enhance your skills, try experimenting with different flavor enhancers and chocolate types. This will allow you to develop unique and exciting variations of the chocolate ganache recipe. As you continue to practice, you’ll become more comfortable with the process, and your creations will become increasingly sophisticated.
Now that you’ve mastered the basics, it’s time to get creative and make your own chocolate ganache recipes. Enjoy the process, and happy baking!