red velvet cake, cream cheese frosting, layered cake
I still remember the first time I savored a slice of red velvet cake with cream cheese frosting; it was love at first bite. The deep, rich flavors and the velvety texture left an indelible mark on my palate.
The classic red velvet cake recipe is more than just a dessert; it’s an experience. It’s about the harmony of buttery, vanilla, and cocoa flavors, complemented by the tanginess of buttermilk.

What elevates this cake to new heights is the cream cheese frosting, adding a creamy and rich contrast to the moist layers. Using high-quality ingredients is crucial to achieving the perfect balance of flavors.
As I reflect on my experience with this beloved dessert, I’m reminded of why it remains a timeless classic. Its allure lies not just in its taste but also in the memories it helps create.
The History and Appeal of Red Velvet Cake
The origins of red velvet cake are as rich and complex as the dessert itself. This cake, known for its striking red color and subtle cocoa flavor, paired with a tangy cream cheese frosting, has become a favorite in many parts of the world, especially in the Southern United States.
Origins of Red Velvet Cake
Red velvet cake is said to have originated during the Great Depression, with its popularity boosted by the use of red food coloring. The cake’s history is closely tied to the Southern United States, where it became a staple at social gatherings and celebrations. The original recipe involved a reaction between the cocoa powder and acidic buttermilk, which gave the cake its distinctive color.

Why Red Velvet Cake Remains a Beloved Classic
So, why does red velvet cake remain so popular? One reason is its unique flavor profile, which combines the subtle bitterness of cocoa with the sweetness of sugar and the tanginess of cream cheese frosting. Additionally, the cake’s striking red color makes it visually appealing, turning it into a centerpiece for any gathering. As Food & Wine magazine notes, “Red velvet cake is a masterclass in texture and flavor contrast.”
The cake’s enduring popularity can also be attributed to its cultural significance. It has been featured in numerous culinary events and has become a symbol of Southern hospitality. The combination of its rich history, unique taste, and aesthetic appeal makes red velvet cake a beloved classic.
Essential Ingredients for the Perfect Red Velvet Cake
To bake a red velvet cake that’s both moist and flavorful, it’s crucial to select the right ingredients. The quality and type of ingredients used can significantly affect the final product’s taste, texture, and appearance.
Dry Ingredients and Their Purpose
The dry ingredients in a red velvet cake recipe include cake flour, unsweetened cocoa powder, baking powder, and salt. Cake flour is preferred over all-purpose flour because it produces a tender crumb. Unsweetened cocoa powder gives the cake its characteristic flavor and color.
The Role of Cocoa Powder in Red Velvet Cake
Cocoa powder is not just a flavor enhancer; it also contributes to the cake’s red color when combined with the acidic buttermilk. The type of cocoa powder used can affect the intensity of the flavor and color.
Wet Ingredients and Their Role
Wet ingredients such as butter, eggs, buttermilk, and red food coloring play a crucial role in the cake’s moisture, texture, and color. Buttermilk, in particular, reacts with the baking soda to help the cake rise and adds a tangy flavor.
| Wet Ingredient | Role in the Cake |
|---|---|
| Butter | Adds richness and moisture |
| Eggs | Contributes to structure and moisture |
| Buttermilk | Reacts with baking soda, adds tanginess |
Understanding the Red Coloring Options
The distinctive red color of red velvet cake can be achieved using either natural or artificial food coloring. The choice between these options depends on personal preference and the desired intensity of the color.
Natural vs. Artificial Food Coloring
Natural food coloring, derived from sources like beets or turmeric, offers a more subtle color and is considered a healthier alternative. Artificial food coloring provides a more vibrant and consistent color but may be less appealing to those seeking natural ingredients.

Required Equipment and Tools
Before you start baking your red velvet cake, ensure you have all the necessary equipment. The right tools will make the process smoother and help you achieve a professional finish.
Baking Pans and Size Considerations
For a layered red velvet cake, you’ll need 9-inch round cake pans. The size is crucial as it affects the baking time and the overall appearance of your cake. Ensure your pans are in good condition and properly greased to prevent the cake from sticking.
Mixing Equipment
A mixer is essential for creaming the butter and sugar, beating the eggs, and mixing the batter. You can use either a stand mixer or a handheld electric mixer. Additionally, a whisk is necessary for combining dry ingredients and ensuring they are well incorporated.
Additional Tools for Success
Other essential tools include a rubber spatula for scraping the sides of the bowl and a cooling rack for cooling your cake layers. Having these tools on hand will make the baking process more efficient.
| Equipment | Purpose |
|---|---|
| 9-inch round cake pans | Baking cake layers |
| Mixer | Creaming butter and sugar, beating eggs |
| Whisk | Combining dry ingredients |
| Rubber spatula | Scraping the sides of the bowl |
| Cooling rack | Cooling cake layers |
Preparing Your Workspace and Ingredients
To ensure a smooth baking process, preparing your workspace and having all ingredients ready is essential. This step is often referred to as mise en place, a French term that means “everything in its place.”
Mise en Place: Setting Up for Success
Having all your ingredients measured and ready to use before you start mixing is crucial. This includes sifting dry ingredients like flour and cocoa powder, and having wet ingredients like buttermilk and eggs at the right temperature. A well-organized workspace helps in avoiding last-minute rushes and mistakes.
Proper Ingredient Temperature Guidelines
It’s essential to have all ingredients at room temperature before starting. This is particularly important for eggs and butter, as it ensures they mix smoothly and evenly.
Why Room Temperature Ingredients Matter
Using room temperature ingredients helps in achieving a uniform texture in your cake. Cold ingredients can lead to a dense or uneven batter, which affects the final texture of your red velvet cake. By having your ingredients at the right temperature, you’re following one of the key preparation tips for making the best red velvet cake.
Step-by-Step Red Velvet Cake Batter Preparation
The process of making red velvet cake batter involves several key steps that ensure the final product is moist and flavorful. To achieve the perfect batter, it’s essential to follow a systematic approach.
Creaming the Butter and Sugar
Creaming the butter and sugar is the first step in preparing the red velvet cake batter. This process involves beating the butter and sugar together until they are light and fluffy, incorporating air into the mixture. I use a stand mixer with a paddle attachment for this task, as it efficiently beats the ingredients to the right consistency.
Tip: Ensure the butter is at room temperature to achieve the best results.
Adding Eggs and Vanilla
Once the butter and sugar are creamed, the next step is to add eggs one at a time, followed by vanilla extract. This adds moisture, richness, and depth to the cake. It’s crucial to add the eggs gradually, allowing each egg to fully incorporate before adding the next.
Incorporating Dry Ingredients and Buttermilk
The dry ingredients, including flour, cocoa powder, and salt, are then incorporated into the batter, alternating with buttermilk. This step is critical for achieving the right texture and flavor. I use a gentle folding motion to combine these ingredients, being careful not to overmix.
Adding the Red Coloring
To give the cake its distinctive red color, red food coloring is added to the batter. The amount of coloring needed can vary depending on the intensity of the color desired. I mix the coloring into the batter thoroughly to ensure an even distribution.
Final Mixing Techniques
The final step in preparing the red velvet cake batter is to ensure all ingredients are well combined. This involves a gentle mixing process to avoid developing the gluten in the flour, which can result in a dense cake.
| Step | Action | Tip |
|---|---|---|
| 1 | Cream butter and sugar | Use room temperature butter |
| 2 | Add eggs and vanilla | Add eggs one at a time |
| 3 | Incorporate dry ingredients and buttermilk | Alternate between dry ingredients and buttermilk |
| 4 | Add red coloring | Mix thoroughly for even color |
| 5 | Final mixing | Mix gently to avoid overmixing |
Baking Your Red Velvet Cake Layers
Perfectly baked red velvet cake layers are the foundation of a beautiful and delicious cake. To achieve this, it’s essential to understand the baking process and the factors that influence the final result.
Oven Temperature and Positioning
Preheating your oven to the correct temperature is crucial. For baking red velvet cake layers, the ideal temperature is 350°F (177°C). Ensure that you position your baking pans in the center of the oven to promote even baking.
Determining Proper Baking Time
The baking time for red velvet cake layers typically ranges from 30 to 32 minutes. However, this can vary depending on your oven and the size of your pans. It’s essential to keep an eye on your cakes as they bake.
Testing for Doneness
To check if your cake layers are done, insert a toothpick into the center of the cake. If it comes out clean or with a few moist crumbs, the cake is ready. If not, continue baking in short intervals until the toothpick comes out clean.
Cooling Techniques for Perfect Layers
Once baked, remove the cake layers from the oven and let them cool in the pans for a few minutes. Then, transfer them to a wire rack to cool completely. This step is crucial for preventing the cakes from becoming soggy or developing cracks.
| Baking Factor | Guideline |
|---|---|
| Oven Temperature | 350°F (177°C) |
| Baking Time | 30-32 minutes |
| Doneness Test | Toothpick comes out clean |
By following these guidelines and paying close attention to your cakes as they bake, you’ll be able to achieve perfectly baked red velvet cake layers that are ready to be assembled into a stunning layered cake.
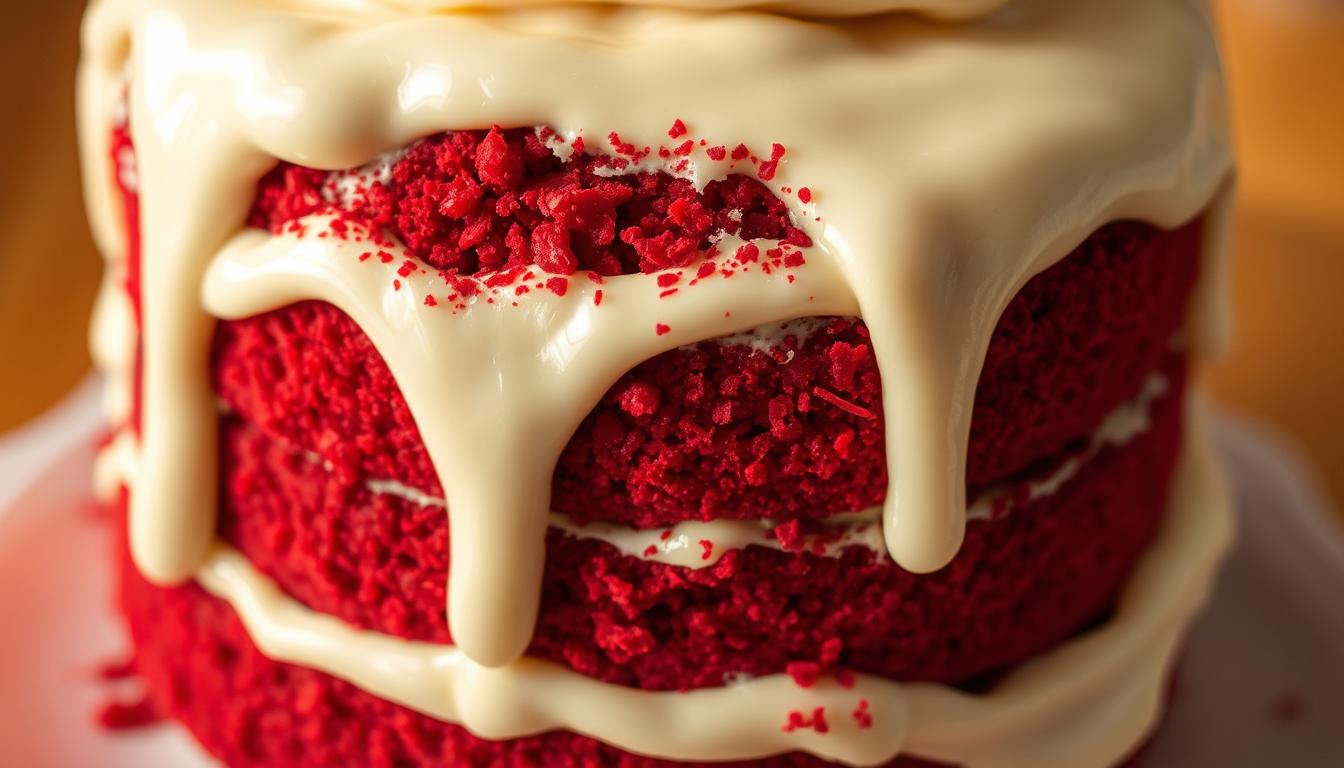
Making the Perfect Red Velvet Cake with Cream Cheese Frosting
To elevate your red velvet cake to the next level, a rich and creamy frosting is essential. The perfect complement to the moist, velvety cake is a tangy cream cheese frosting that adds depth and complexity to each bite.
Ingredients for Classic Cream Cheese Frosting
The foundation of a great cream cheese frosting lies in its ingredients. You’ll need brick-style cream cheese, butter, confectioners’ sugar, and a hint of vanilla extract. Using high-quality ingredients ensures a smooth and creamy frosting that will hold its own against the bold flavor of the red velvet cake.
Mixing Techniques for Smooth Frosting
Achieving a smooth and creamy frosting requires the right mixing technique. Start by beating the cream cheese and butter until they’re fully incorporated and smooth. Gradually add the confectioners’ sugar, beating well after each addition. Finally, add the vanilla extract and mix until combined. The key is to beat the mixture just until it’s smooth, avoiding overmixing that can lead to a too-thin consistency.
Troubleshooting Common Frosting Issues
Even with the best ingredients and techniques, issues can arise. Here are some tips for troubleshooting common problems.
Fixing Runny Frosting
If your frosting is too runny, it might be due to overmixing or warm ingredients. Try refrigerating it for about 10-15 minutes to firm it up, then re-whip it gently. If it’s still too runny, you can add a small amount of confectioners’ sugar to thicken it.
Dealing with Lumps
Lumps in your frosting can be a nuisance. To avoid them, make sure your cream cheese and butter are at room temperature before you start mixing. If you still encounter lumps, try beating the frosting for a few extra minutes to break down the lumps, or strain it through a fine-mesh sieve to remove them.
By following these guidelines and tips, you’ll be well on your way to creating a stunning and delicious red velvet cake with cream cheese frosting that’s sure to impress.
Assembling Your Layered Red Velvet Cake
With your red velvet cake layers baked to perfection, it’s time to bring them together into a stunning layered cake. Assembling your cake is a crucial step that requires some finesse, but with the right techniques, you’ll achieve a beautiful and delicious result.
Leveling and Preparing Cake Layers
Before you start assembling, ensure your cake layers are level. I use a cake leveler or a serrated knife to remove any domes or uneven edges. This step is crucial for stability and visual appeal. Once leveled, place the first layer on your serving plate or cake stand.
Frosting Between Layers
Apply a generous amount of cream cheese frosting on top of the first cake layer. I spread it evenly, making sure to cover the entire surface but not overdoing it, as this can make the cake messy. The frosting acts as a glue, holding the layers together and adding flavor.
Crumb Coating Techniques
After stacking all the layers, apply a thin crumb coat of frosting around the cake. This initial layer traps any stray crumbs, ensuring your final layer of frosting is smooth. Chill the cake in the refrigerator for about 10-15 minutes to set the crumb coat.
Final Frosting Application
For the final layer, apply a generous amount of frosting, smoothing it out with an offset spatula or a turntable. I work from the top down, ensuring an even coat. This final layer should be smooth and polished, showcasing your beautifully layered red velvet cake.
Serving, Storing, and Troubleshooting
With your layered red velvet cake complete, the next steps are serving, storing, and troubleshooting any issues that may arise. Ensuring that your cake is presented well and remains fresh is crucial for any occasion.
Best Practices for Cutting and Serving
When it comes to serving your red velvet cake, using the right tools is essential. Use a sharp, thin-bladed knife to cut clean slices. For a layered cake, it’s helpful to chill it in the refrigerator for about 15 minutes before slicing to firm up the frosting. This makes cutting cleaner and helps maintain the cake’s presentation.
Tips for Serving:
- Use a cake stand to elevate your cake, making it the centerpiece of your dessert table.
- Garnish with fresh flowers or red velvet cake crumbs to add a decorative touch.
- Serve at room temperature to ensure the cake is moist and the frosting is creamy.
Storage Tips for Freshness
To keep your red velvet cake fresh, proper storage is key. The cake should be stored in an airtight container in the refrigerator to maintain freshness. If you live in a hot or humid climate, consider storing it in the refrigerator even if you’re serving it the same day.
Storage Tips:
- Place the cake in an airtight container to prevent drying out.
- Store it in the refrigerator to keep the frosting from melting.
- Bring the cake to room temperature before serving for the best flavor and texture.
Common Problems and Solutions
Even with careful preparation, issues can arise. Here are some common problems and their solutions:
Dry Cake Issues
If your cake turns out dry, it might be due to overbaking or incorrect ingredient ratios. To prevent this, ensure accurate measurements and check your oven temperature with an oven thermometer.
Sinking Layers
Sinking layers can occur if the cake is not baked long enough or if it’s opened during baking, causing it to collapse. Make sure to bake until a toothpick inserted comes out clean.
Color Problems
If the red color isn’t vibrant, check the type of food coloring used. Gel or paste coloring can provide a more intense color than liquid. Also, ensure you’re using the right amount of coloring.
By following these tips for serving, storing, and troubleshooting, you can ensure that your red velvet cake remains a showstopper from the first slice to the last.
Conclusion
With the techniques and tips outlined in this article, you’re now equipped to create a stunning classic red velvet cake recipe that’s sure to impress. By following the steps for preparing the perfect red velvet cake batter, baking your cake layers to perfection, and making a creamy cream cheese frosting, you’ll be well on your way to crafting a truly unforgettable homemade red velvet cake.
As you practice and refine your skills, you’ll find that making a red velvet cake becomes second nature. Don’t be discouraged if your first attempts don’t turn out exactly as you hope – with patience and persistence, you’ll soon be creating beautiful, delicious cakes that are sure to become a favorite among family and friends.
So why not get started today and make your dream red velvet cake a reality? With a little practice and patience, you’ll be creating show-stopping cakes that are sure to impress.